
Imports and Exports
Bring links in from CSV, the old WordPress plugin, Pretty Links, Bitly, or ClickMagick, and download backups.
Import brings links you already have from somewhere else into this app, so you do not have to retype them. Export downloads a copy of your links as a file you can keep or open in a spreadsheet.
Before you import
- Add your domain first (see Using Your Own Domain). Every imported link has to be attached to a domain, and you choose that domain on the Import page.
- Get the file from your old tool. Each source has its own export step, listed on the matching tab.
- Try a few rows first. Copy 5–10 rows into a small test file and import that before the whole list. It takes two minutes and catches mistakes while they are still easy to undo.
Pick the tab that matches where your links come from
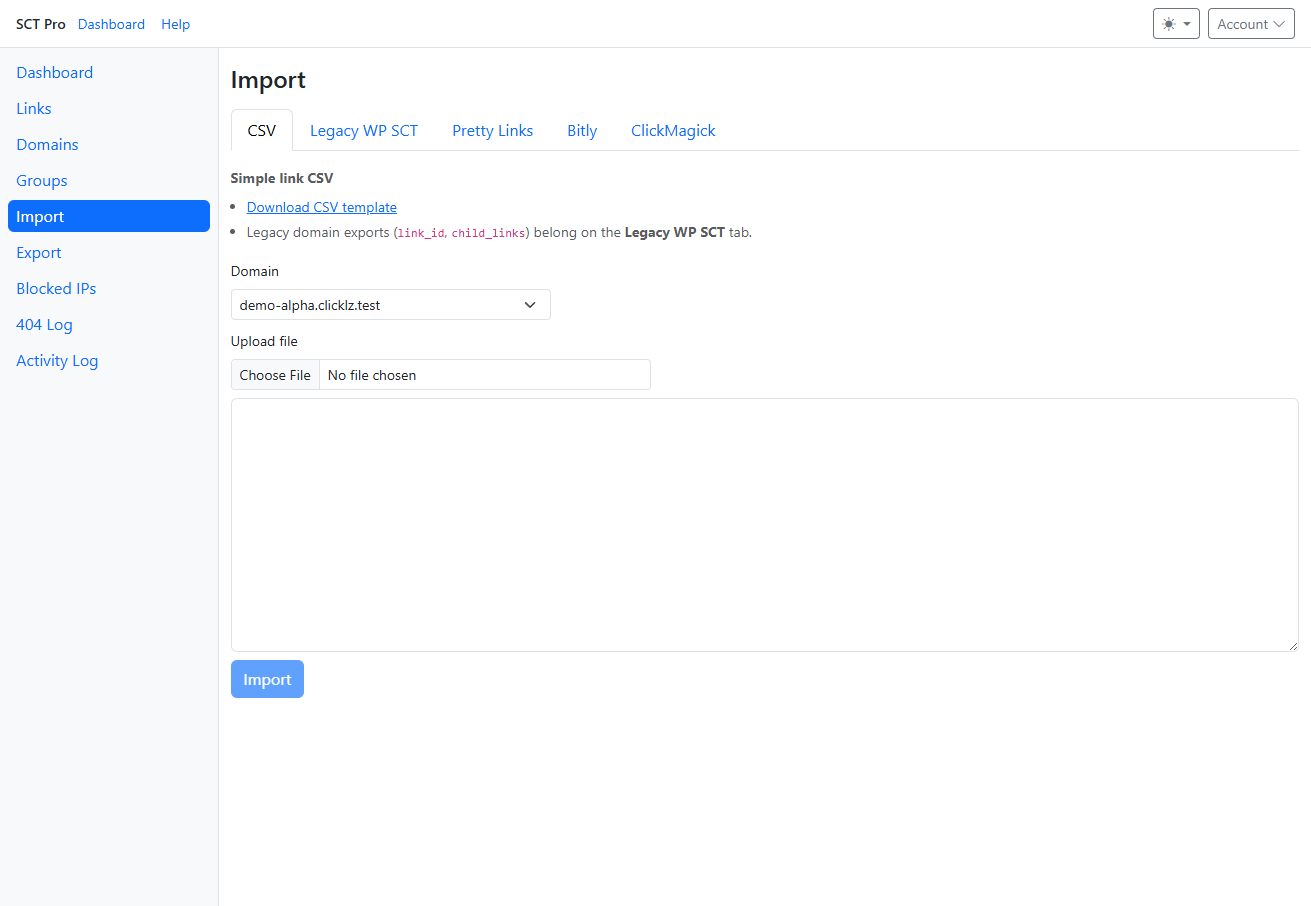
The tab you choose tells us how to read your file. Choosing the wrong one is the most common import problem.
- CSV
- For a simple list you build yourself. Click Download CSV template, fill it in with your own links, and upload it. Best choice when your links are currently in a spreadsheet or a document.
- Legacy WP SCT
- For the older Simple Click Tracker WordPress plugin. In the old plugin use Export → Export Data To CSV By Domain, then upload that file here. Big files import in batches, so leave the page open until it finishes.
- Pretty Links
- In WordPress go to Pretty Links → Import/Export, click Export, then upload the file here.
- Bitly
- In Bitly go to Links → Export, download the file Bitly emails you, then upload it here. A paid Bitly plan is required for a full export.
- ClickMagick
- No file needed. Paste your ClickMagick API key (found in your ClickMagick account settings, Standard or Pro plan) and we fetch the links directly.
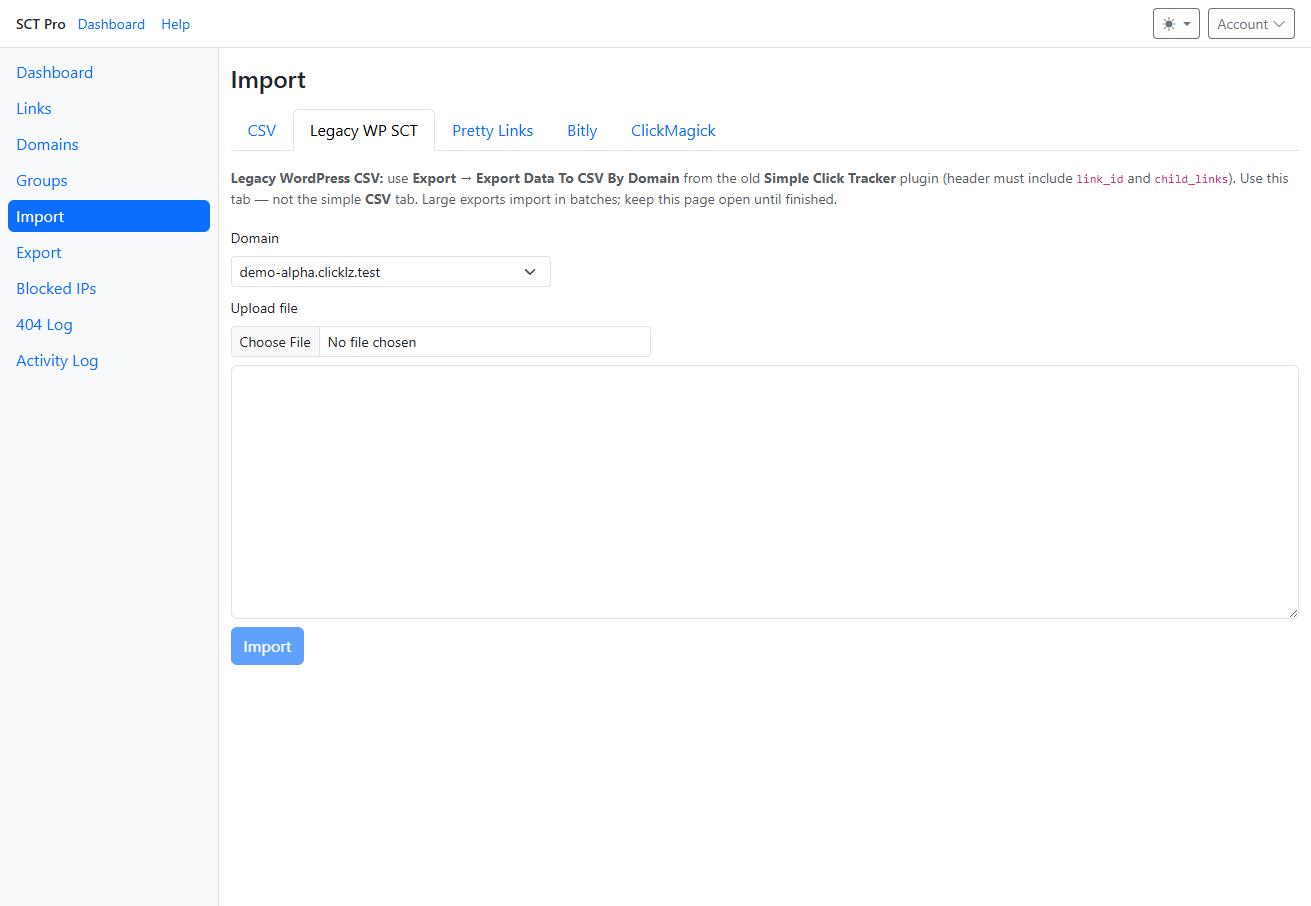
Each tab tells you exactly where to get the file it expects. Read that line first.
Running the import
- Choose the correct tab.
- Pick the Domain your imported links should live on.
- Use Upload file to select your file. Its contents appear in the box below so you can see what will be imported. (You can also paste rows straight into that box.)
- Click Import and wait for the confirmation.
Understanding the result message
When the import finishes you get an Import complete summary. It counts four things, and the last three are normal to see:
- Imported — links successfully created.
- Skipped (path already exists) — you already have a link using that path on that domain, so we left your existing link untouched rather than overwriting it.
- Skipped (invalid row) — the row was missing something required or malformed, for example a blank destination.
- Failed — the row could not be saved. If you see these, note the details and try that row again on its own.
If anything was skipped, the box titled Import notes and skipped rows lists one line per affected row. Read it before re-importing — otherwise you will hit the same skips again. Fix those rows in your file, then import just those.
Transferring straight from the old WordPress plugin
If the old Simple Click Tracker plugin is still installed, you do not have to export a file at all. Install the SCT Connect plugin (see Account, Billing and Integrations), connect it to this account, then open Settings → SCT Connect in WordPress. Under Transfer Legacy SCT WP Plugin Data it shows how many domains and links it found and sends them here directly. You can leave Enable redirect handling off during the transfer so the old plugin keeps serving redirects; connection and redirect handling are independent.
This is usually the easier route for a whole site, because it moves every domain in one pass and it can bring your click history with it — something a file export cannot do. Links are sent newest first, then older ones, so recent links show up here before the rest of the backlog finishes. Split and rotator arms stay in their original order.
Running it again updates matching links. When a path already exists on that domain in this account, the import overwrites that link’s settings from the WordPress plugin (name, destination, type, and arms). Paths never keep a trailing slash. If the old plugin has the same path more than once in one transfer, only one SaaS link is created or updated. Click history stays on that link.
Bringing your click history across
Tick Also transfer click history before starting the transfer. Your links are created first, then historical clicks are sent over in batches with a progress bar, newest clicks first and then older ones, so recent history is available in your reports before the rest of the backlog finishes. Only clicks from the last 12 months are transferred. Leave the WordPress page open while it runs.
- A failure shows the reason. If a batch fails, the message includes the HTTP status and the text the server returned (a gateway timeout, a PHP error, a rejected request) so you can see whether to change the plugin or the server. The full response is also written to the site's PHP error log.
- It is safe to run again. Each transferred click is recognised on arrival, so clicks that already came across are skipped rather than counted twice. If the transfer is interrupted, run it again and it picks up where it stopped.
- Older clicks stay behind. Clicks recorded more than 12 months ago are not imported. The plugin shows how many recent clicks will transfer before you start.
- Run it again at the end of a phased migration to collect any clicks the old plugin recorded in the meantime.
- Clicks follow their link. A click can only transfer if its link exists here, so transfer links first. Clicks whose link was never created are reported as skipped.
- UTM values come too when the old plugin recorded them. Very old installations did not store UTM data, and the plugin will tell you if yours is one of them.
Exporting your links
Open Export, optionally pick a single domain (the default is All domains), then click one of:
- Download CSV — opens in Excel, Google Sheets, or Numbers. Use this for reviewing, sharing, or bulk editing.
- Download JSON — a developer-friendly format. Choose this only if someone asked you for it.
Not sure which? Choose CSV.
Habits worth keeping
- Export before any big cleanup or bulk delete. It is your undo button.
- Name things consistently in your file before importing — it is far quicker than renaming links afterwards.
- Keep the dated export files somewhere safe, so you always have a record of what your links looked like.