
Getting Started
New to Simple Click Tracker? Follow these steps to publish and test your first tracked link.
New here? This page walks you through your very first tracked link, one step at a time. No technical background needed.
What you will need
- The web address (URL) of the page you want people to end up on — for example
https://example.com/spring-sale. - A short web address of your own to send people through, such as
go.yourcompany.com. This is called your domain. - Access to wherever your domain was purchased (GoDaddy, Namecheap, Cloudflare, your web host, etc.). You will paste one setting there. If someone else manages this for you, you can forward them Step 3.
Setting up your first link takes about five minutes. Waiting for your domain to start working can take longer — see Step 3.
Step 1: Pick a plan
The first time you sign in, you will see the Choose a plan screen. Pick the plan you want and click Start free or Subscribe. Each plan card lists how many links and domains it allows, so choose the one that matches how much you expect to use.
You cannot create links until a plan is active. You can change plans later from Account › Billing.
Step 2: Use the Getting started box
After your plan is active, a box titled Getting started appears. It creates your domain and your first link together, so it is the fastest way to begin. Fill in three fields:
- Domain — the short address you want to use, typed as a plain host name:
go.example.com. Do not includehttps://and do not add anything after the name. - Short link path — the ending you want people to see, such as
/welcome. Letters, numbers, dashes and underscores only. - Destination URL — the full address of the real page, including
https://.
Click Create domain and link. Together those three fields make one short link. In the example above, visitors would use https://go.example.com/welcome and land on your real page.
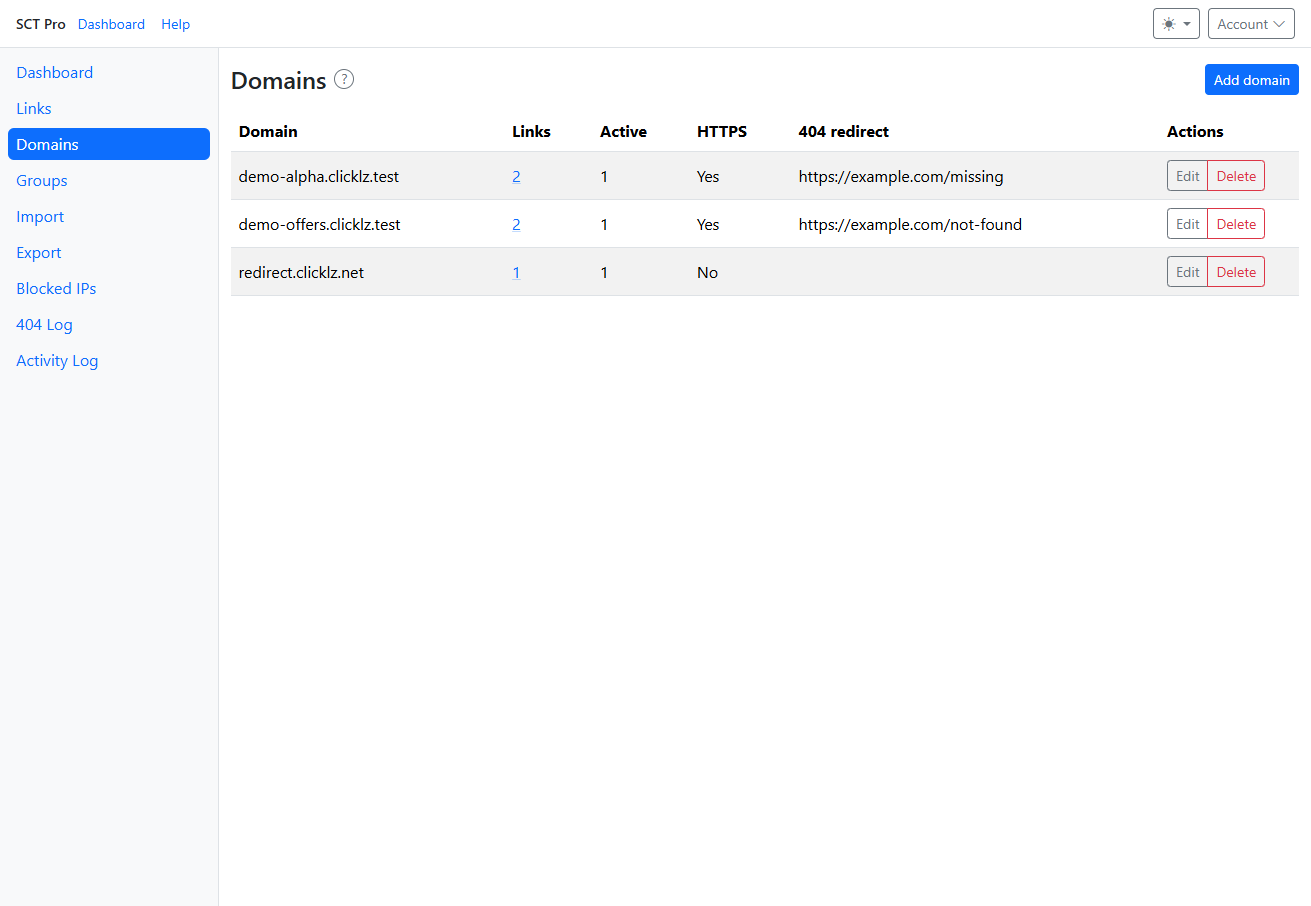
The Domains page after setup. Each domain you add appears here as a row.
Step 3: Point your domain to us (the one technical step)
The steps below are for a new domain or a dedicated subdomain used only for short links (for example go.yourcompany.com). If you want short links on the same domain as a website that is already live, do not point DNS at SCT — see Using Your Own Domain for SCT Connect (WordPress) or the standalone script.
Your short link will not work yet. Right now your domain does not know where to send visitors, so you have to tell it once. After you create the domain, we show you a server IP address — a number that looks like 165.245.154.6.
Take that number to whoever hosts your domain and add one setting:
- Record type:
A - Name / host: the part in front of your domain (for
go.example.comentergo), or@if you are using the bare domain with no prefix - Value / points to: the IP address we showed you
This is called a DNS A record. In plain terms: DNS is the internet's phone book, and you are adding your entry so browsers know which building to knock on. Nothing else about your website or email changes as long as you use a prefix such as go or links.
Step 4: Create a link (if you skipped the wizard)
Go to Links and click New link. You will be asked to choose a link type first — pick Standard. That means "send every click to one page", which is what you want for your first link.
Then fill in the important fields and click Save:
- Name — a label just for you, so you can find this link later. Visitors never see it.
- Domain — pick the domain you added. The next time you create a link, that domain stays selected.
- Path — the ending of your short link, such as
spring-sale. - Destination URL — the real page you want people to reach.
Everything else can stay as it is. You can always come back and edit the link later.
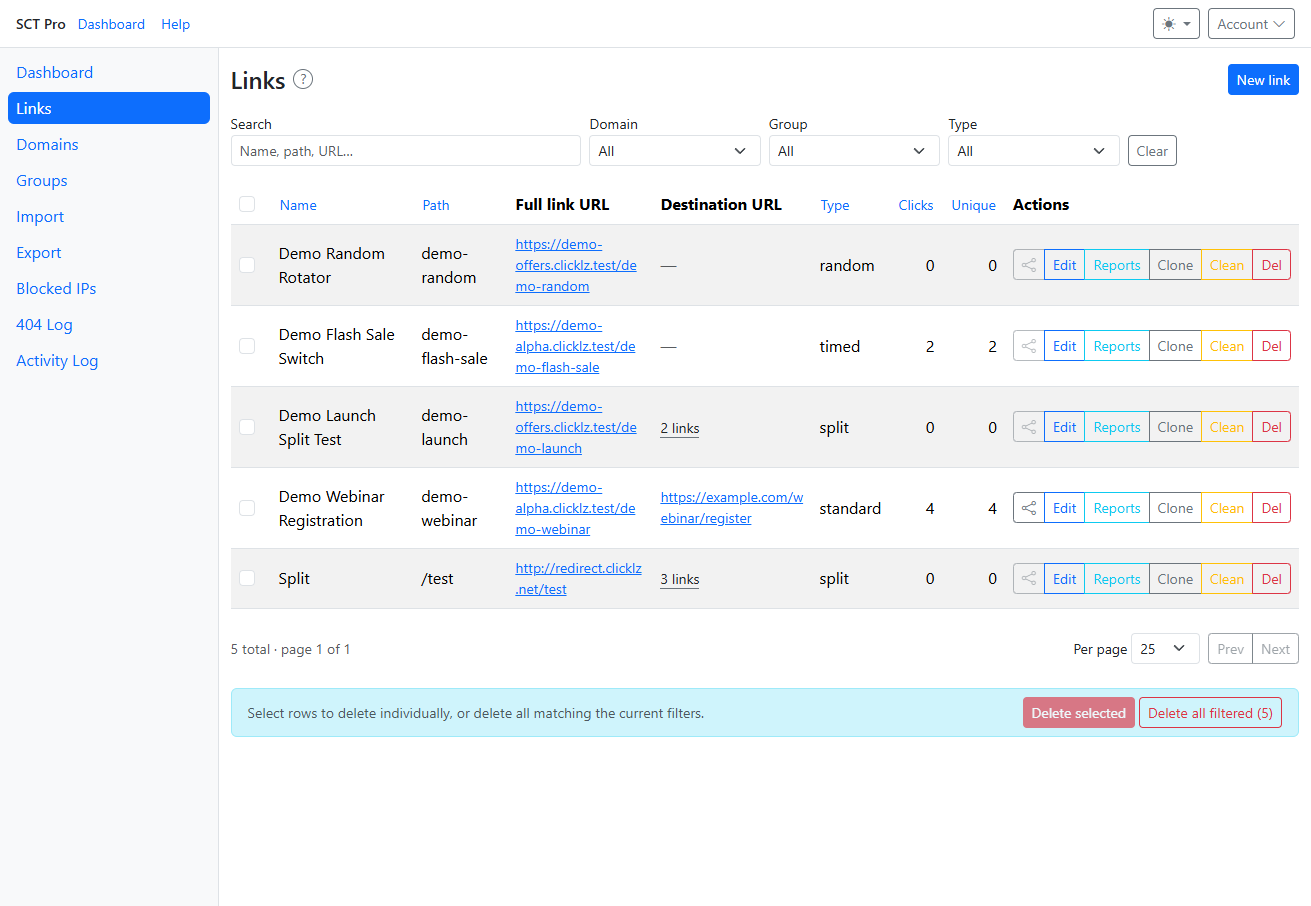
Your saved links appear here. The Full link URL column is the address you share with people.
Step 5: Test it and check your first click
- On the Links page, click the address in the Full link URL column.
- Confirm your browser lands on the correct destination page.
- Open Dashboard. Your visit should appear in the click totals and in the chart.
Numbers on the Dashboard are grouped by date range. If you do not see your click, make sure the range covers today by clicking 1d or 7d, then click Refresh.
If something does not work
- Link shows an error or does not load: the domain is probably still pointing to the wrong place. Recheck Step 3 and give DNS more time.
- You reach a "not found" page: the path may be misspelled. Compare what you typed in the browser to the Path value on the Links page. Mistyped paths are also recorded on the 404 Log page.
- Link works but no clicks appear: check the date range on the Dashboard, then click Refresh.
Stuck on a word used in this guide? See Glossary: Plain-English Terms. Have a specific problem? See Troubleshooting Common Problems.
Get help without leaving the app
Inside the app (Dashboard, Links, and other screens), a Help button sits in the bottom-right corner. Open it to search these Help articles or send a message to support.